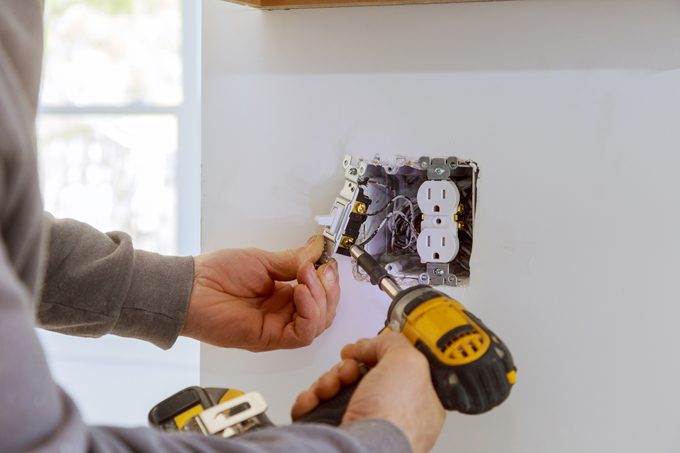
Wiring a Switch and Outlet the Safe and Easy Way
Research the Task
The number one thing any homeowner should be aware of is whether or not they feel comfortable or possess the necessary expertise when dealing with electricity," notes Joe Hammer, owner of SAK Plumbing & Electrical of Phoenix, Arizona. "Working with electricity is a fundamentally different scenario compared to tasks like fixing a leaky faucet or a squeaky door.
Yes, that's correct, but according to Williamson, "Replacing switches and receptacles is still something a DIY enthusiast can handle!" Before you begin, it's a good idea to do your research; determine if learning to install a light or outlet is something you're ready to tackle. "The internet is a valuable resource, particularly YouTube," Williamson notes, adding that he frequently uses it for guidance.
It's a good idea to have the right tools within reach
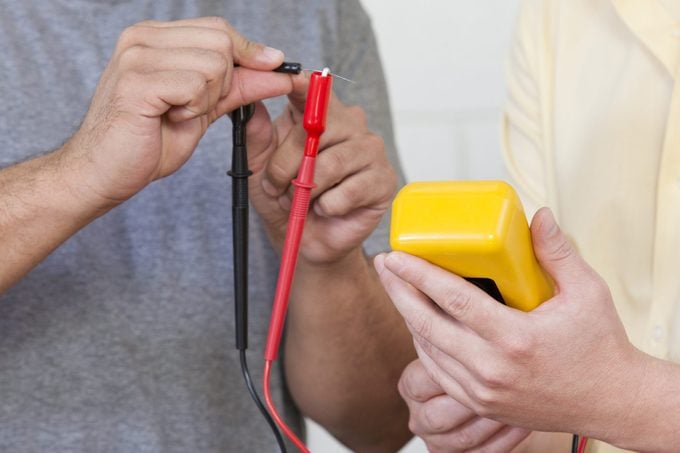
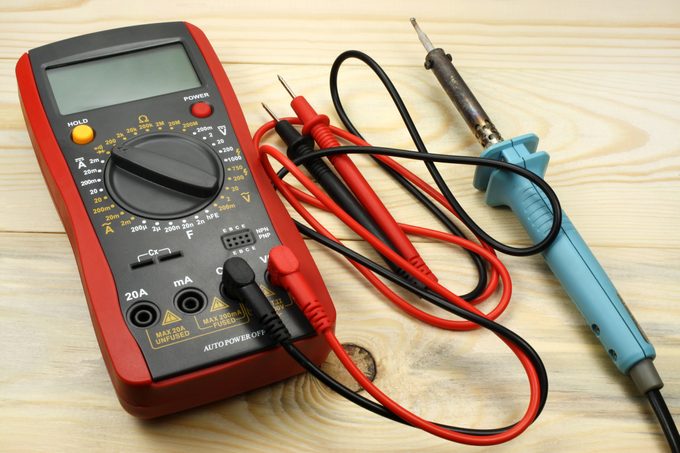
You only need a basic set of tools, including a multi-screwdriver and wire strippers, a level, and some electrical tape. And it's also necessary to have a way to confirm the electricity is turned off before starting any project. Williamson advises using these three testers to ensure you're covered for most tasks:
- This device beeps and flashes when it senses a live wire. Always use a non-contact voltage tester whenever you're doing electrical projects at home.
- This compact device fits in the palm of your hand and notifies you if an outlet is correctly wired. Additionally, if the lights turn on, it confirms you have an operational power source.
- This is a fantastic diagnostic tool that lets you troubleshoot issues, such as if you think there's a faulty wire somewhere in the circuit, or to determine how much voltage is being delivered to your devices.
"They used to be pretty high-end gadgets a while back," Williamson says. "Now, they've become really affordable, and the technology's gotten a lot more advanced." To use one, simply insert the transmitter into an outlet or light socket and wave the receiver over the circuit breaker panel to pinpoint which breaker controls which circuit.
It's helpful to familiarize yourself with each testing tool," Williamson says, "because they have specific uses, so be sure to read the instructions to understand their capabilities and any limitations they may have.
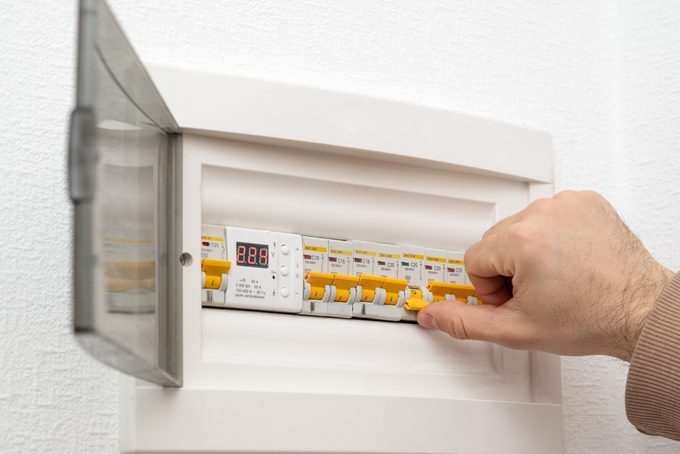
Turn Off the Power
"Most states need electric panels to be clearly labeled for safety and compliance," Hammer says. "Each circuit breaker must be clearly marked to show what part of the house it supplies power to." Turn off the breaker that matches the problem area.
Labeling on circuit breakers can sometimes be unclear. If so, plug a loud device such as a TV into a circuit and listen for when it stops producing sound when the power is turned off. When that happens, it should indicate the specific circuit. Alternatively, to pinpoint the circuit powering a light switch, simply turn on the switch and cycle the circuit breakers until the light goes dark, or enlist assistance to minimize repeated trips back and forth.
If the main breaker is still not working, consider switching off the main circuit breaker. "To identify the correct breaker to turn off, go to the breaker panel and flip the main circuit breaker," advises Talbot. However, note that the large wires supplied by the outside transformer will remain energized even with the main switch turned off.
Test Every Circuit
Before starting to investigate any switch or outlet, it's crucial to check, double-check, and check again, as emphasized by Williamson.
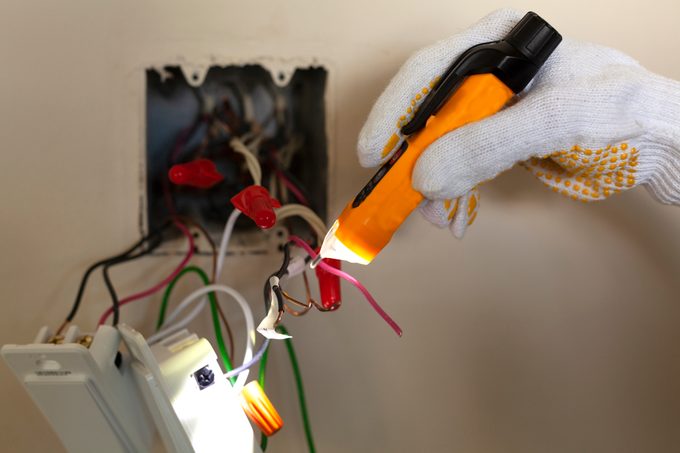
First, use your non-contact voltage tester to make sure it's working properly by testing it on a circuit where you know the power is on. After verifying its accuracy, carefully remove the cover plates and devices, taking care not to touch any switches or receptacles by their screws until you're certain the power is off. Now, thoroughly check every wire and connection with the tester to confirm they're de-energized. Once you've confirmed all the circuits are powerless, test the tester again on a live circuit to ensure it's functioning correctly.
Before Purchasing a Smart Switch, Be Sure to Research and Compare Options
In the United States, building codes specifically require a grounded conductor, also known as a neutral wire, for smart switches, programmable dimmers, and occupancy sensors to function properly. This applies to new construction projects, renovations, and repairs, unless there are certain exceptions.
Please check the wiring box to see if you have a neutral wire there. It should be a white wire that's tucked away in the back and not connected to the light switch. If there is a white wire connected to the switch, it's not being utilized as a neutral wire.
"If there's no grounded conductor in the box, you will need to find an alternative," according to Williamson. Look for devices labeled 'no neutral required.' You may need to purchase an additional hub or Wi-Fi bridge for them to function. Be sure to thoroughly review the instructions, as installation against the manufacturer's guidelines may pose an electrical danger.
Extend Too-Short Conductors
It is commonly referred to as Romex in the US.
If your opening is less than eight inches in size, typically in a residential circuit box or plug outlet, when pulled out, the wires should extend at least three inches from the box to meet the National Electrical Code standards.
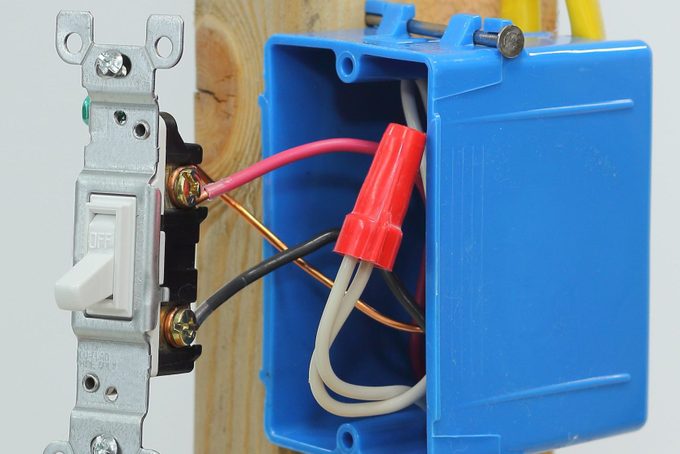
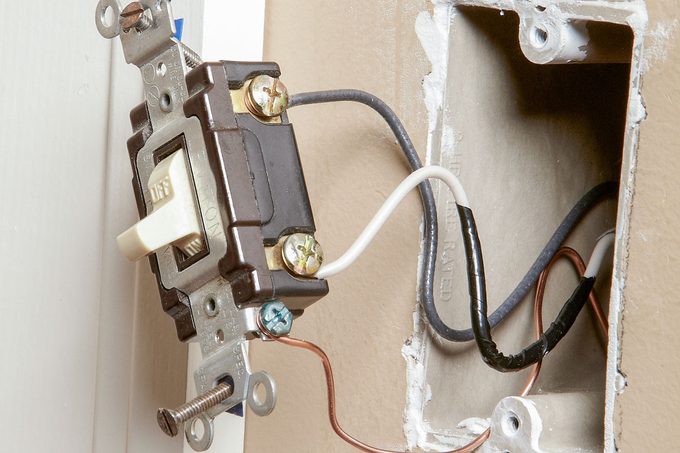
Label the switched connections with either "hot" or "neutral". In a typical system, the "L1" (or "hot" wire) is always the one that carries mains power. The "L2" (or "neutral") is the one that is only live while the circuit is being used. In some systems, the "L2" carries a pilot light circuit that stays on until the circuit is either turned on or off.
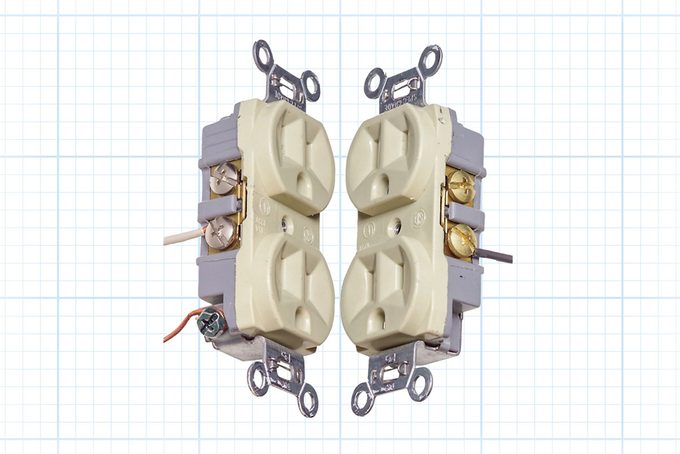
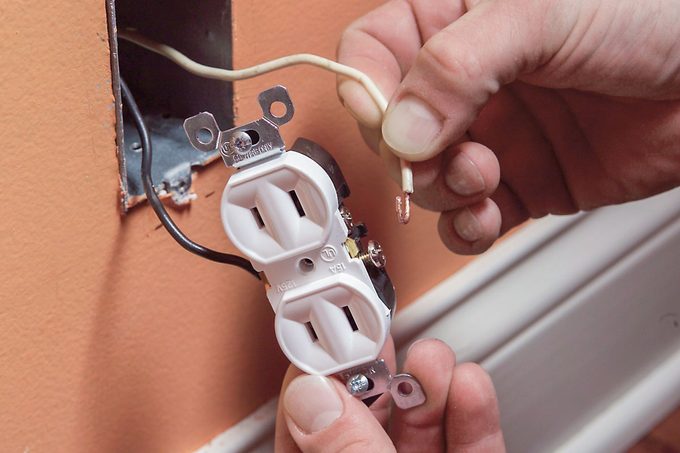
On the back of a standard duplex outlet, the holes for the hot wires have a brass-colored terminal labeled "HOT," while the neutral wires have a silver-colored terminal labeled "WHITE." If you mistakenly swap these wires, the outlet will still function, but it's not secure, and harm won't become apparent until someone is electrocuted.
The switch is intended for connecting a grounding means, which is specifically the bare copper or green equipment grounding wire, when it's present in the enclosure.
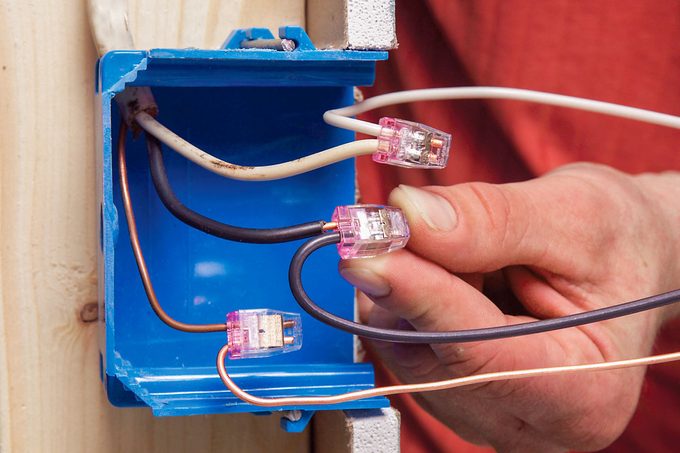
Avoid Backstabbing
In addition to terminal screws, receptacles and switches also have alternative holes for wiring installation, which you can "backstab" the wires into.
to connect these devices.
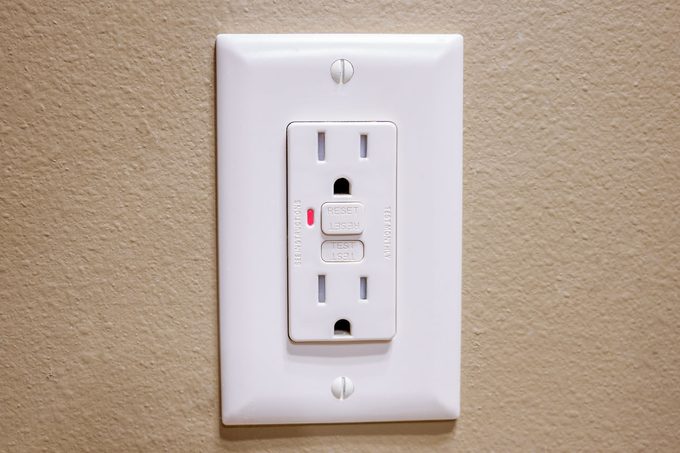
"GFCI" stands for Ground Fault Circuit Interrupter, a type of electrical outlet designed to protect against electrical shock. AFCI, which stands for Arc Fault Circuit Interrupter, is also a type of outlet, designed to detect arcing faults before they become electrical fires. When a GFCI receptacle senses an imbalance in the flow of electricity to the ground, it automatically shuts off power to the circuit, reducing the risk of electrical shock. AFCI receptacles, on the other hand, can usually be reset once the faulty arc fault has been cleared.
Electric shock and house fires can be prevented by Ground Fault Circuit Interrupters (GFCI) and Arc Fault Circuit Interrupters (AFCI). According to the National Electric Code, these devices must be installed in certain areas for new buildings, renovations, and repairs. If you're unsure where they're necessary, you should consult your local electrical inspector. They can give you protection from electric receptacles or circuit breakers.
There is no text to paraphrase. Please provide the text you would like me to paraphrase.
Make Two-Prong Receptacles Safer
The devices are also known as "non-grounding type receptacles." There are a few alternatives that can be used to replace them and make them safer, all without requiring a major electrical retrofit.
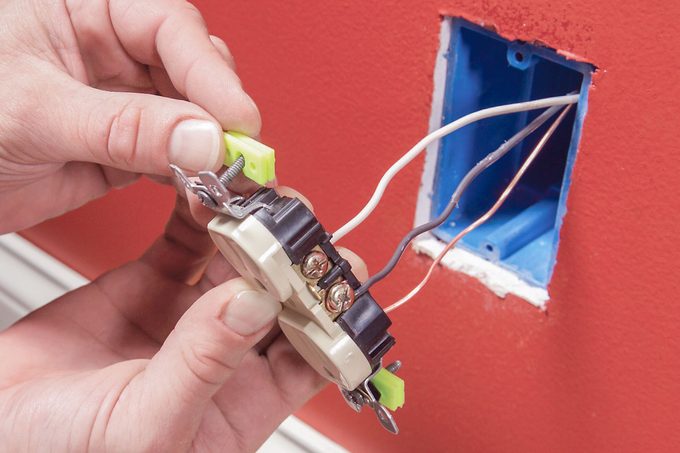
- If you don't have a grounding method already in place, like a bare or green copper grounding wire, you can install a GFCI to prevent shocks if it's feasible. According to Williamson, in any case, a GFCI "if nothing else, will provide some sort of shock prevention." Use the load side of the GFCI to protect the other outlets on the circuit, but first mark the GFCI "No Equipment Ground" and the downstream outlets "GFCI protected" and "No Equipment Ground".
- You can also replace a two-prong, non-grounding outlet with a new one that's the same, but that won't improve safety or allow you to plug in a three-prong cord. Never use an adapter, and don't disable the grounding prong on a plug. If it's safe to use a grounding option in that box, you'll need to install a three-prong outlet instead.
Use Tamper-Resistant Receptacles
You probably have a family story about accidentally sticking something into an electrical outlet, or maybe you've protected your home with safety devices to prevent this common accident. The National Fire Protection Association suggests that around 2,400 children are hurt each year due to this incident, and some even lose their lives.
Ground fault circuit interrupters (GFCIs) are essential for preventing objects from being inserted into outlets," Hammer explains, adding that they are required in almost every room in the home, with some exceptions. If you're updating older outlets, it's essential to replace all non-ground fault circuit interrupters with them. "It's more than just cautioning against sticking a fork into an outlet," Hammer emphasizes. "It genuinely safeguards your kids from electrical shock.

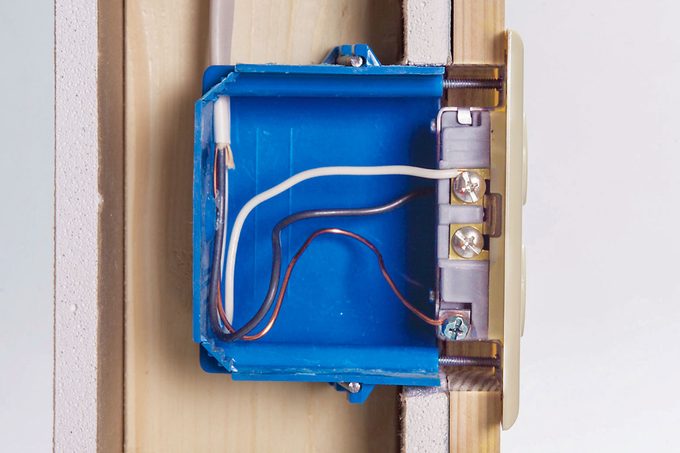
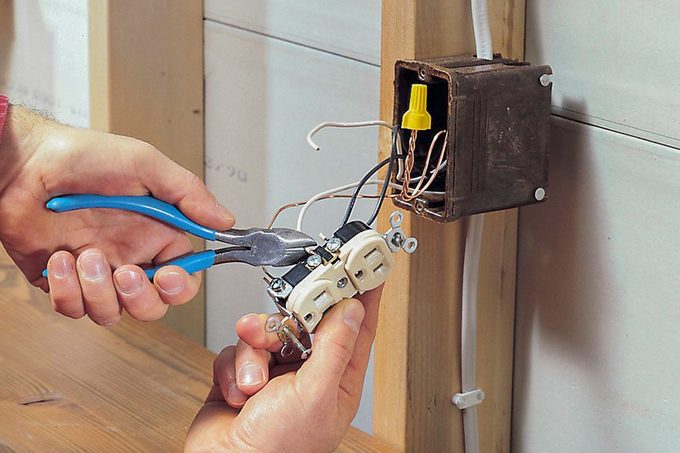
Pack Boxes Neatly
Electrical boxes have limited space, and devices and conductors take up a lot of room. “When it comes to new installations, I choose the largest box I can,” Williamson notes. I don't skimp on expenses. The extra cost of a larger box is a very small percentage of the total cost of electrical materials for the project.
Unless you're building an addition, you may find yourself limited to the box size provided by the electrician when the devices were smaller. Carefully use pigtails only as necessary, and after each connection, neatly arrange the wires and push them to the back of the box. Maintaining tidy wires and connections enhances safety and minimizes headaches for you and subsequent homeowners.
Support Your Work
.
You can create a secure connection to the box by tapping under the screws with plastic spacers, often referred to as "caterpillars" by electricians, or by using a small nut or a copper wire coil. However, make sure to note that according to the National Electric Code (NEC), in non-combustible materials like drywall and tile, you're allowed a quarter-inch of setback for the box, but in cases where the wall is made of combustible material, such as wood paneling, the box must be installed flush.
.
Wire a Three-Way Switch
A two-way switch is the most basic type of electrical device. Turning it in one direction allows the power to flow through and the light to turn on. Conversely, flipping it in the other direction severs the connection, shutting off the light.
The way things can get confusing when you have multiple lights controlled from various locations is understandable. It was a challenge I faced as an amateur electrician, and it took me a few hours of trial and error to understand the concept behind a three-way switch setup. Here's the basic principle behind it:
- Standard snap switches typically feature two brass terminals for power and a single green ground screw or wire. One terminal receives the power supply, while a "switch leg" carries the power to the light fixture from the other terminal.
- An extra terminal is available, known as the "common". Power flows into the switch at the common point, then two "traveler" wires connect the first switch to the second one on the brass terminals.
- On the second three-way switch, the connection moves from the common to the light(s). This setup allows either switch to control the light. To control a light from four or more locations, adding a four-way switch between two three-way switches is necessary.
Identify All Wires
Many residential electrical cables, often branded Romex, consist of separate wires with unique functions. "Each wire has a specific purpose in a Romex cable," said Hammer. In standard 120-volt household circuits, the black wire carries the electric current, while the white wire is the grounding wire, also known as the neutral wire. For higher-voltage circuits, such as those powering an electric dryer, two black wires, one and one red, are used instead.
It's a good rule of thumb to identify and label multiple circuits in an electrical box, otherwise, put a marker on the wires with electrical tape, painter's tape, or twist them together in a way that makes sense. As Williamson notes, "without clear identification, finding hidden wiring can become a significant problem weeks or even months after the drywall is installed."

Label Your Breakers
Part organizing your electrical system is labeling your wires. Now's the time to resolve tracking down the circuit you need to work on. Figure out what each breaker handles, and take the time to label your breakers. "This could be a color system, or a piece of tape next to the switch, with notes describing each corresponding room," suggests Hammer.
When it comes to ensuring electrical safety, knowing how to wire a light switch or outlet is just the beginning of responsible DIY electrical work. Take some time, grab a marker and some tape, and spend about 20 minutes identifying and labeling your circuits. This will help keep your panel tidy and assist both you and future homeowners to be safe and secure.
Before undertaking any major work on a project, have you considered obtaining a permit? In many areas, local authorities require a permit for projects that meet specific criteria and regulations. Some examples of major work that typically require a permit include:
* Repairs to existing structures within a historic district or on a designated historic property
* Building additions or expansions in flood zones
* Projects involving the installation of electrical, gas, or water main service lines
* Work on buildings with a zoning designation that requires a permit for a specific type of activity
* Demolition projects
Having a permit can help ensure compliance with local building codes and zoning regulations. It can also help protect the public and property owners by preventing potential safety hazards and maintaining the integrity of the neighborhood character.
Updating a light switch or adding a light fixture is perfectly fine. However, be sure to familiarize yourself with the rules and regulations in your area, as they can vary. It's a good idea to double-check with your local city or state to ensure you're in compliance.
Things are evolving too. "The process of replacing hardware hasn't changed, but the NEC has made several updates, so a homeowner will need more information than in the past," Williamson explains. If you're unsure, Talbot suggests contacting a licensed electrician for major electrical changes, even if a permit isn't needed. "Electricians are knowledgeable about local permits and codes," so they're always available to help. That's exactly what we're here for.
FAQ
What is the purpose of the red wire on a standard US household light switch?
In general, the red wire typically serves as a secondary hot wire. On a smart switch, this wire usually connects to the switch leg, controlling a light or load. Inside an electrical box, the red wire might function as a runner wire, a switch leg, or the second hot wire on a 240-volt circuit.
Can you install a light switch in the reverse order it's usually installed?
You can't connect a traditional two-pole switch incorrectly by switching the positions of the brass screws that accept either the power or switch wires. In contrast, smart switches have two wires - a hot and a neutral - which gives them flexibility in wiring, even when connected in reverse. However, three-way and four-way switches require careful handling: it's possible to incorrectly wire them if you swap the traveler wires, hot wire, or switch leg.
Not all light switches have a grounding wire, but the usefulness of a grounding wire is significant for safety purposes. In residential settings, it is a requirement for most light switches in the United States to have a grounding wire. However, there are exceptions such as some old homes, certain commercial settings, or countries where the electrical requirements differ.
If the switch is brand new, look for a green screw or wire. “Switches and lighting controls now come with a green grounding screw or green pigtail wire that must be connected to a grounding wire or metal box which is actually grounded,” Williamson points out. “Similarly, new receptacles also have this feature.” However, if your home is older, there might not be a grounding option available in the box for you to connect the green screw or wire to.
About the Experts
- A certified building official with 45 years of experience with electric installations, inspections, instruction, and management, plus over 30 years of consulting and writing about various DIY electrical projects for numerous publications.
- "Based in Phoenix, this electrical and plumbing company has been serving the surrounding communities for more than three decades. Company owner, Hammer, and his team of experts specialize in all aspects of the construction trade, providing homeowners and businesses with dependable and cost-effective electrical repair and installation services that meet code requirements.
- Electrical services franchise in Chattanooga, Tennessee.
Sources
- Tamper-Resistant Electrical Outlets.
Post a Comment for "Wiring a Switch and Outlet the Safe and Easy Way"